photo HomeHeaderPages_zps121b83d7.jpg  photo AboutHeaderPages_zps6faf416f.jpg  photo ContactHeaderPages_zps0989aee4.jpg
Showing posts with label Before/After. Show all posts

Monday, March 3, 2014

Before/After: Wood Slab to Coffee Table

Pretty excited about how great this turned out!
My original Saturday plans were to work on making another shirt, put the finishing touches on a filing cabinet I've been re-doing, and watching some Netflix. However, after eating breakfast with my roommates and chatting about the downstairs area in our house I decided I wanted to turn our current coffee table (piece of wood on cinder blocks) into a padded/more colorful coffee table.
Spruce: A Step-By-Step Guide to Upholstery & Design - $22.14

I got the book listed above as a Christmas present for myself, and not only is it amazing, but it had a great tutorial for a tufted ottoman. After talking things over with my roommates we decided that we didn't want to do tufting because we wanted to keep the coffee table as a flat surface to place things on besides our feet. After looking up color schemes and brainstorming what we wanted the downstairs area to look like I took off to JoAnn's and Home Depot to get the supplies I needed. I'm putting all of the other pictures and my step by step process after the link!


Wednesday, September 18, 2013

DIY - Transform Old Shoeboxes

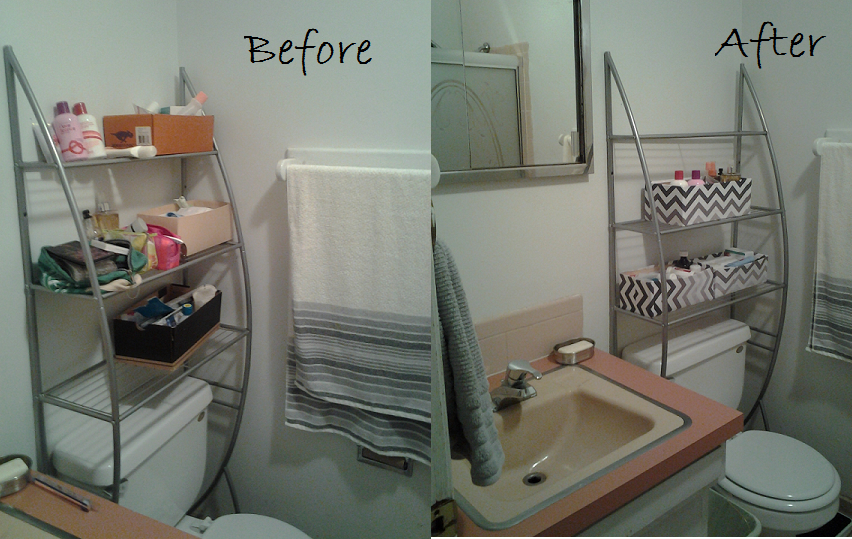
Before: my weak attempt at a storage solution                    After: much more appealing and put together

It's the little things that really bring a room together. Having coordinating colors and themes while playing with different patterns also helps. I don't really have much room in my bathroom, the only storage areas are under the sink and behind the mirror. I use the space under the sink to store cleaning supplies, and keep products I use on a more day to day basis on my shelving unit above the toilet. I decided last year to start storing some of my things like nail polish, make up, medicine, etc. in old shoe boxes I had laying around to cut back on having all of my knickknacks everywhere. You can see how even though things are in boxes in the before picture it's still pretty messy, and none of the boxes match each other or the grey/black/white/pink theme of the room. I've seen plenty of pictures of cute little boxes or baskets people have bought to hide clutter while keeping things pretty and I decided to just cover the boxes I already had.


Thursday, April 11, 2013

Before/After: Bucket to Ottoman

My staple gun broke so I don't have the fabric completely flush yet :(

No way that's a bucket in that second picture is probably what you're thinking. But you'd be wrong because it is! It's covered with some padding and batting to make it cushy, but at it's core it's a cheap orange Home Depot bucket. I love cheap projects and I was thrilled when Design*Sponge posted a DIY tutorial that was the work of Liz and Rachel and Leland who work at Commonwealth Vintage Rentals, and Revive Upholstery & Design respectively.

Glorious, right? 
Photo Credit: John Fitzgerald and Braden Spotts

Monday, March 25, 2013

Dresser Re-Do

Old ugly dresser                                                                Revamped gorgeous dresser

So the dresser to the left lived in the storage/junk shed out back behind my parent's house for as long as I can remember. My brother and I lived together briefly in an apartment in NY, and when we moved my parent's gave this dresser to my brother to use. Long story short he moved out and left the dresser behind, and when I moved to Colorado it came along with me in my huge Uhaul. Needless to say it was an eyesore, lucky for me I have nice walk-in closets big enough for the dresser to fit in.Still I hated how it was in such bad shape, the old brass handles,the chipping wood  paneling ( is that even what it is ? ). I'd seen tons of dresser re-dos on many of my favorite blogs and on pinterest, and I figured well the worst that could happen is that the thing ends up uglier and I just get rid of it.