 |
| Old ugly dresser Revamped gorgeous dresser |
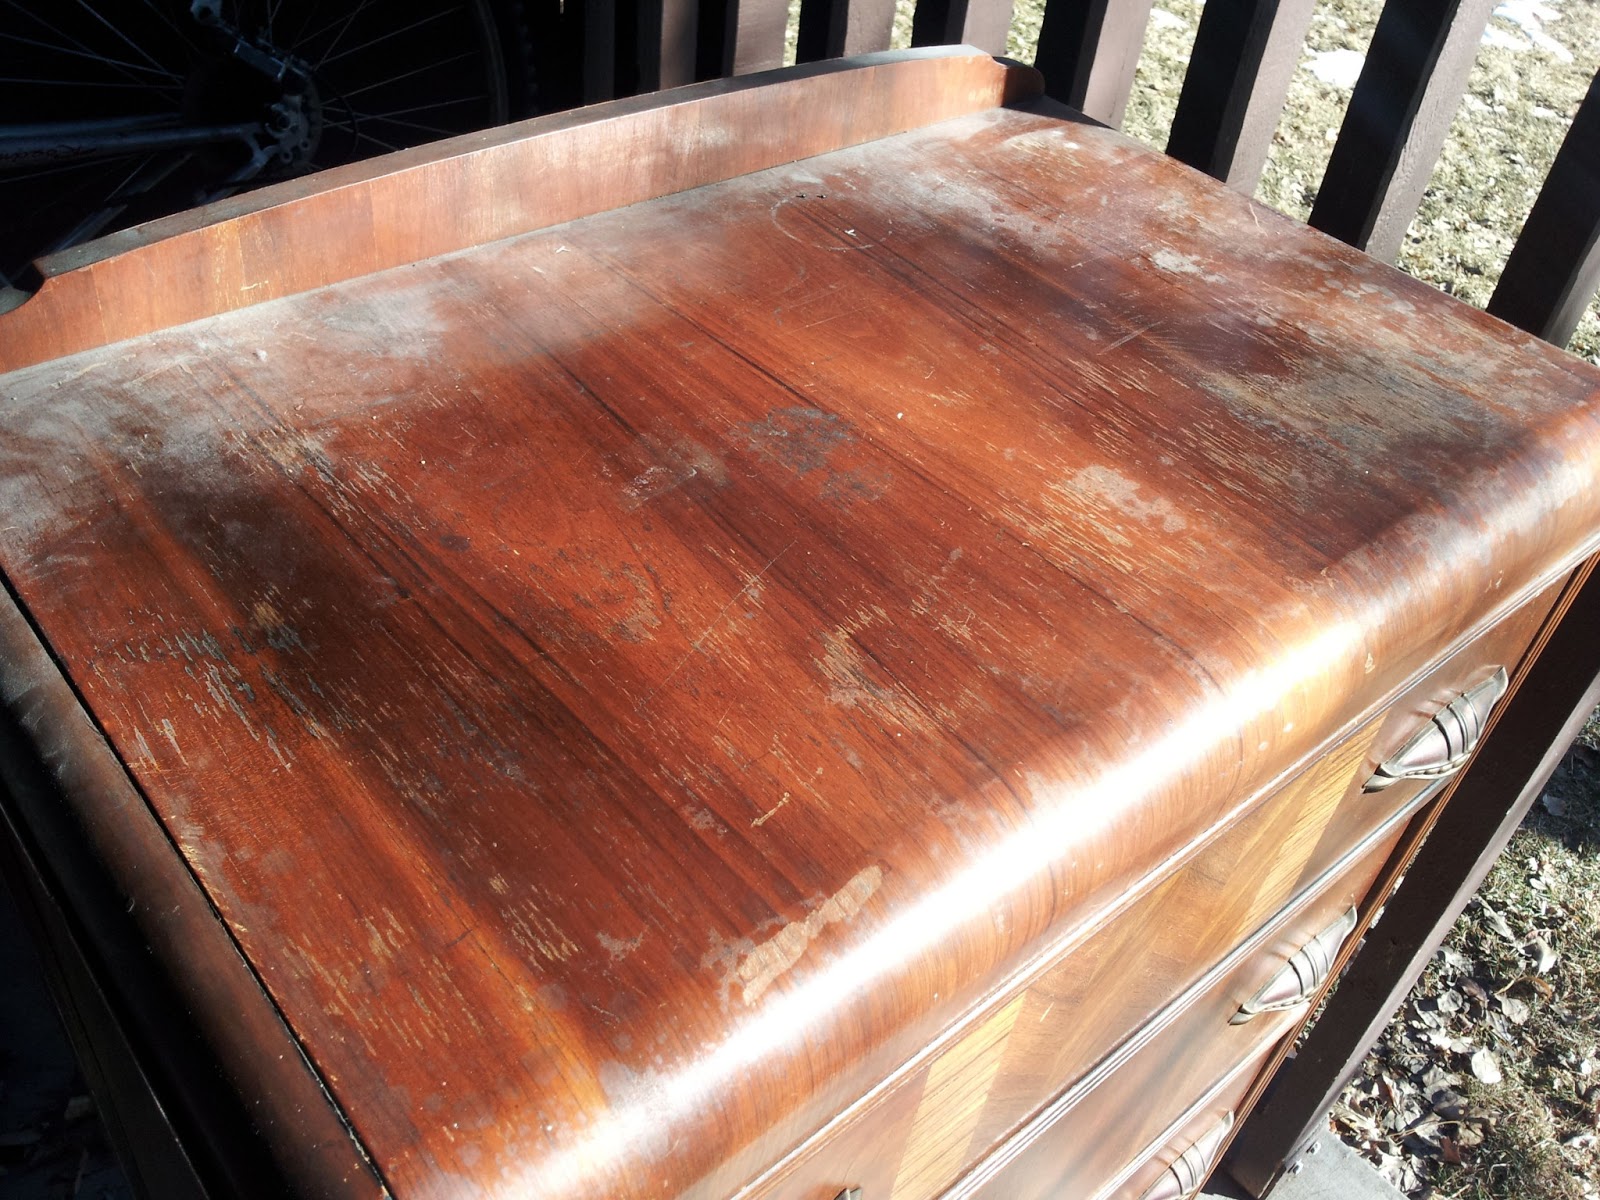
So the dresser to the left lived in the storage/junk shed out back behind my parent's house for as long as I can remember. My brother and I lived together briefly in an apartment in NY, and when we moved my parent's gave this dresser to my brother to use. Long story short he moved out and left the dresser behind, and when I moved to Colorado it came along with me in my huge Uhaul. Needless to say it was an eyesore, lucky for me I have nice walk-in closets big enough for the dresser to fit in.Still I hated how it was in such bad shape, the old brass handles,the chipping wood paneling ( is that even what it is ? ). I'd seen tons of dresser re-dos on many of my favorite blogs and on pinterest, and I figured well the worst that could happen is that the thing ends up uglier and I just get rid of it.
 |
| Worn down top, you can see what a good duster I am (sorry mom) |
|
I knew I was going to replace the dresser handles with new ones no matter what else I did, so I started by taking off the handles, and then filling the holes left behind with some Elmer's brand wood filler.I also used this as a way to fix the places of the paneling that were starting to come off. I've only used the wood filler a couple of times so I definitely need more skill with my application. I tried to fill the holes evenly but in a couple of places I added too much filler, and even after a bunch of sanding there were still some bumpy bits. You can't really notice them from far away, but up close you can and this is something I'd make sure to NOT do when using wood filler in the future.

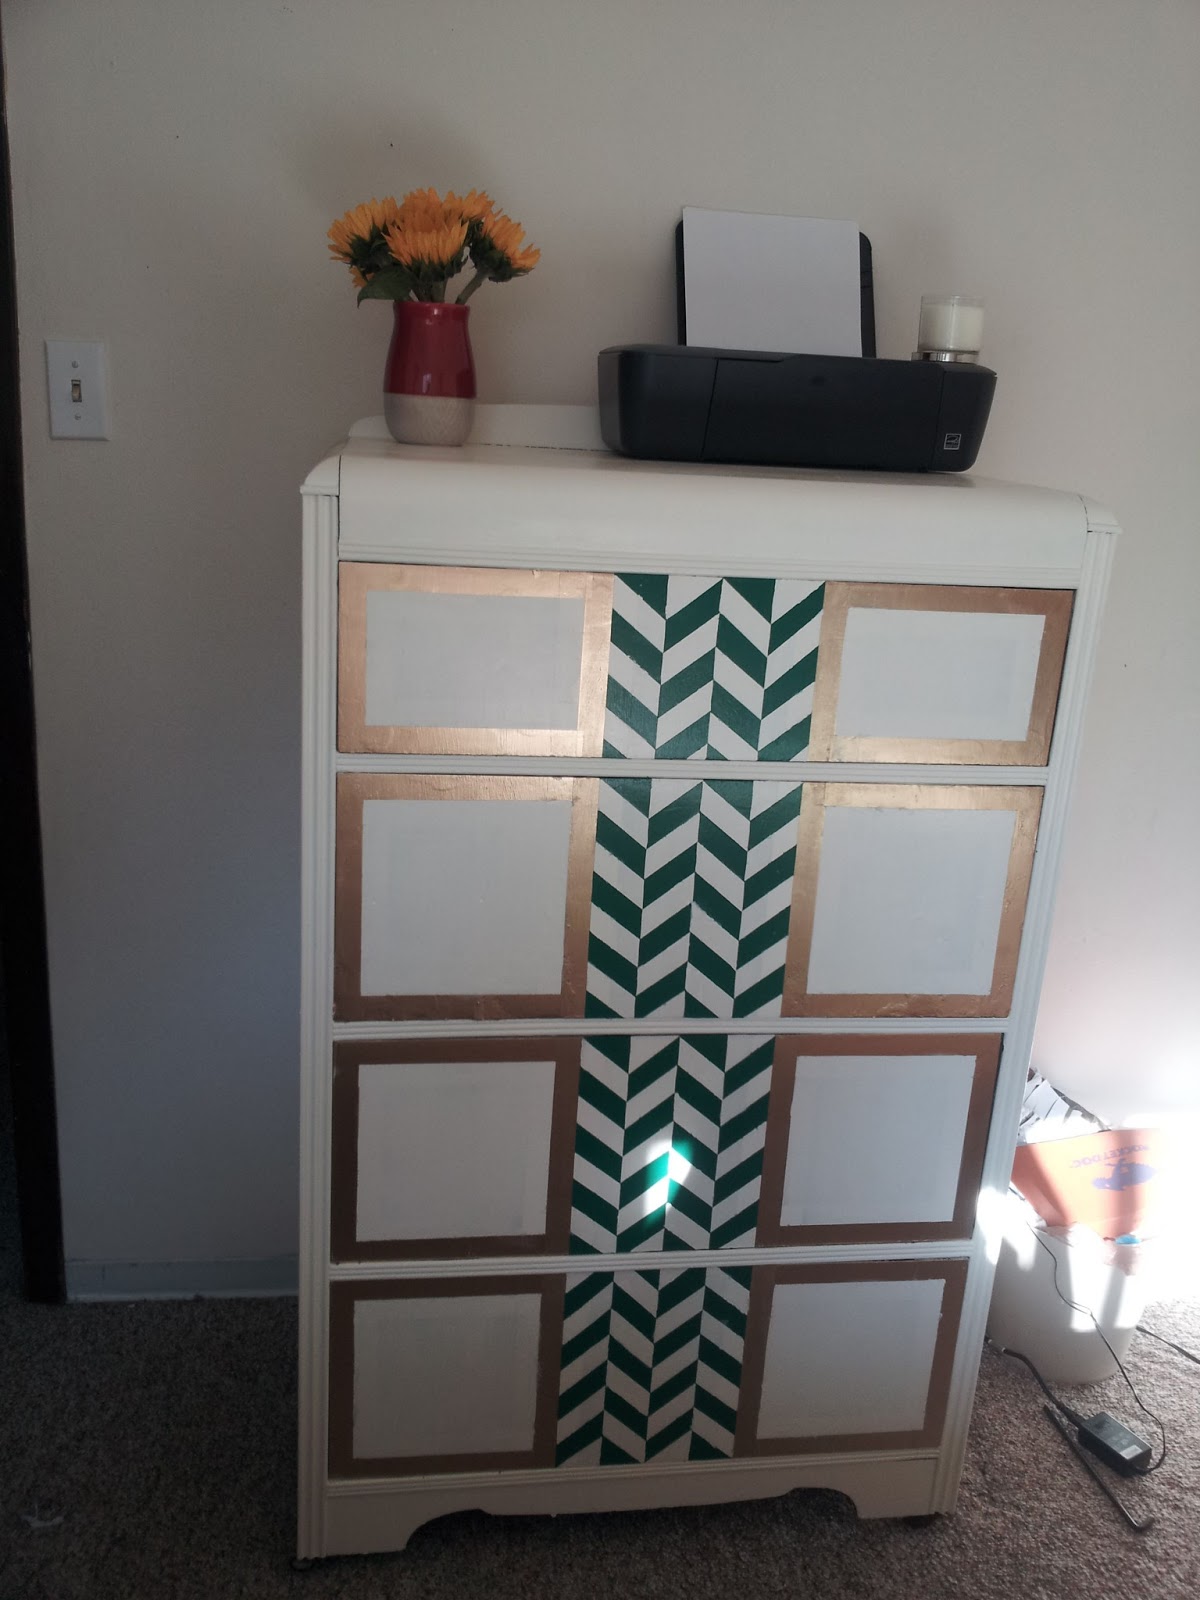
After that was done I sanded the whole entire dresser, excluding the back, until it was smooth to the touch. Then i primed it using spray primer in white. After priming I painted on about 3 coats of Behr beach white. I originally planned to only have gold strips running down the front, and had bought gold spray paint and painters tape in order to tape off & get perfect straight lines. In hindsight I should've spray painted first and then painted the dresser white. Even trying to be careful when spray painting some gold got on the white & I had to go back and touch up those areas a couple of times. Also for some unknown reason when I spray painted over the white some of the spray paint bubbled up in some areas. I looked up possible reasons and the only thing I found was temperature being too cold, or not priming before hand. If I were to do this again I would try to spray paint on top of the primer instead of applying paint and then spray paint. I was able to put another coat on after popping/pressing down some of the bubbles and again it's not really noticeable from far away, but you can see a bit of rippling up close in some spots.

I had planned on doing a herringbone pattern in the center to match the herringbone pattern that was ingrained on the wood on the top shelf, and I had picked out Behr precious emerald, emerald being the Pantone color of the year! It probably took me about an hour to tape off all 4 shelves, and make sure the pattern was uniform throughout. I'm really disappointed in the painters tape I got, I thought the blue stuff was the best but I surprisingly had a lot of leak through to touch up.
|
|
 |
| You can see how it's bumpy here |
|
Looking at it after all the tape was off my boyfriend & I decided it needed more color, and back to the gold spray paint I went. After it dried it was nearly finished, all that was left to do besides some touch up was add some new knobs.
 |
| Boy did I need to sweep my porch |
|
 |
| Love! |
|
I forgot to take pictures of the drilling new holes/adding the knobs, but I simply measured to find the center of the gold square part on each drawer and drilled my hole there, and then screwed the new knobs in. Just like that, voila! It took me about two weekends to do, and then I waited about a month before buying and installing the knobs.
Hope you all enjoyed this before and after, and now you have at least the basics to doing your own furniture re-do.
|
| Old ugly dresser Revamped gorgeous dresser |
So the dresser to the left lived in the storage/junk shed out back behind my parent's house for as long as I can remember. My brother and I lived together briefly in an apartment in NY, and when we moved my parent's gave this dresser to my brother to use. Long story short he moved out and left the dresser behind, and when I moved to Colorado it came along with me in my huge Uhaul. Needless to say it was an eyesore, lucky for me I have nice walk-in closets big enough for the dresser to fit in.Still I hated how it was in such bad shape, the old brass handles,the chipping wood paneling ( is that even what it is ? ). I'd seen tons of dresser re-dos on many of my favorite blogs and on pinterest, and I figured well the worst that could happen is that the thing ends up uglier and I just get rid of it.
|
| Worn down top, you can see what a good duster I am (sorry mom) |
|
I knew I was going to replace the dresser handles with new ones no matter what else I did, so I started by taking off the handles, and then filling the holes left behind with some Elmer's brand wood filler.I also used this as a way to fix the places of the paneling that were starting to come off. I've only used the wood filler a couple of times so I definitely need more skill with my application. I tried to fill the holes evenly but in a couple of places I added too much filler, and even after a bunch of sanding there were still some bumpy bits. You can't really notice them from far away, but up close you can and this is something I'd make sure to NOT do when using wood filler in the future.
After that was done I sanded the whole entire dresser, excluding the back, until it was smooth to the touch. Then i primed it using spray primer in white. After priming I painted on about 3 coats of Behr beach white. I originally planned to only have gold strips running down the front, and had bought gold spray paint and painters tape in order to tape off & get perfect straight lines. In hindsight I should've spray painted first and then painted the dresser white. Even trying to be careful when spray painting some gold got on the white & I had to go back and touch up those areas a couple of times. Also for some unknown reason when I spray painted over the white some of the spray paint bubbled up in some areas. I looked up possible reasons and the only thing I found was temperature being too cold, or not priming before hand. If I were to do this again I would try to spray paint on top of the primer instead of applying paint and then spray paint. I was able to put another coat on after popping/pressing down some of the bubbles and again it's not really noticeable from far away, but you can see a bit of rippling up close in some spots.
I had planned on doing a herringbone pattern in the center to match the herringbone pattern that was ingrained on the wood on the top shelf, and I had picked out Behr precious emerald, emerald being the Pantone color of the year! It probably took me about an hour to tape off all 4 shelves, and make sure the pattern was uniform throughout. I'm really disappointed in the painters tape I got, I thought the blue stuff was the best but I surprisingly had a lot of leak through to touch up.
|
|
|
| You can see how it's bumpy here |
|
Looking at it after all the tape was off my boyfriend & I decided it needed more color, and back to the gold spray paint I went. After it dried it was nearly finished, all that was left to do besides some touch up was add some new knobs.
|
| Boy did I need to sweep my porch |
|
|
| Love! |
|
I forgot to take pictures of the drilling new holes/adding the knobs, but I simply measured to find the center of the gold square part on each drawer and drilled my hole there, and then screwed the new knobs in. Just like that, voila! It took me about two weekends to do, and then I waited about a month before buying and installing the knobs.
Hope you all enjoyed this before and after, and now you have at least the basics to doing your own furniture re-do.


Mom would indeed be extremely disappointed in that dust job, how many weekends did we spend dusting? Dresser looks really cool now though!
ReplyDelete