photo HomeHeaderPages_zps121b83d7.jpg  photo AboutHeaderPages_zps6faf416f.jpg  photo ContactHeaderPages_zps0989aee4.jpg

Wednesday, December 9, 2015

Blue Prints For Sewing A Frame Pencil Skirt

Fabric: African Wax Print from Liberia - A friend brought it back from his travels
Pattern: Blue Prints For Sewing A Frame Skirt - Version 1 (pencil skirt)

When I first saw this pattern I fell in love with the idea of color-blocking and different arrangements of stripes and pattern pieces to make a really unique skirt.  I've had the fabric for about 6 months if not closer to a year and hadn't decided what to make with it because it's such a bold print. Usually I'm not a print person at all. I knew being able to incorporate a solid would help tone this down a little bit and add some fun to my wardrobe. I used some black linen I had leftover from my Tessuti Alice Top for the side skirt front pieces that actually form pockets with the lower side front pieces. I didn't have enough linen left to incorporate any contrasting on the back side pieces of the skirt but I like the solid look on the back.


As far as sewing goes this was pretty straightforward to make. Nothing too challenging or technically involved. I cut a size B for the waist and graded out to an F I believe through the hips. From the bum up to the waist the skirt fits great. I feel like it's a little loose/not as much pencil shape below the bum and down to the knees due to it being graded to an F. I have a wide hips and a round derriere but my legs aren't that big. I think next time I'll grade back down to a C/D by the hem. I did take it in a few inches at the bottom but think it can still stand to be taken down a few inches more. Ignore the chalk in the picture. I didn't wash it post making and marking before I decided to wear it. Woops. Another woops happened when I was ironing my waistband after attaching. I guess I had my iron turned up to high because it burned right through the fabric exposing the interfacing inside (see the bottom left picture?). I didn't want to cut another waistband so I did some 'visible mending' with some orangeish thread I have. I kind of like it and think it adds some fun detailing. I think this might've been my first time sewing a lapped zipper and it was pretty straightforward and lines up nicely.

 You can see what I was talking about in the middle picture, the skirt doesn't curve back in below my bum like a traditional pencil skirt should. I think I might leave it as is because I'm lazy and I don't want to unpick the side seams to take it back in. It still fits nicely and has a nice shape from the front. Just like my last post this skirt can be worn in the summer or spring and in the winter or fall with tights and layers. I was looking through some of my old blog posts and man the pictures and quality of the pictures is just horrible. I feel like i'm able to take better pictures now that I have my dress form to hang my clothes on while I photograph them. It really makes for a world of difference and I want to be able to share all of those small details with you. Thanks again mom for the awesome gift it's very well loved. 

Sleeveless Granville Button Up in Lizzy House Natural History Fabric

Fabric: Lizzy House Natural History Fabric 
Pattern: Sewaholic Granville Button Up 
Previously Blogged: Navy Blue Eyelet Strip Granville Button Up 

The next couple of blog posts I'll be sharing are all clothes that would normally be considered 'out of season'. I've been sewing spring/summer clothes for two reasons: 1) going to Mexico for Christmas vacation in 9 days! and I wanted to make some new things to wear down there and 2) I didn't make half of the things I wanted to when it was the spring/summer season. I feel like sewing out of season works best for me. I usually find myself wanting to make a million things and getting to about three of them and then the season is over before I wear anything. This way I'll have all of these new spring and summer clothes ready to go right on time. I plan on carrying this through and making fall and winter clothes during the spring and summer. I'm sure there will be new pattern releases that tempt me and I may jump ship but for the most part I think it's just easier and less stressful for me. 

 
This is my second time making a Granville Button Up. The link for my first version is up above. Previously I had made a size 8 that was graded down to a 6 in the waist and back to an 8 for the hips but I didn't like the hip wings I got. I slimmed this version down and kept it at a 6 through the hips and it fits perfectly. I also decided to make it sleeveless mainly so that it'd be nice for the summer but it's also perfect for layering under sweaters and not having to worry about the bulkiness of sleeves. The fabric has a slight stretch to it which I really like and is pretty comfortable over all. I wish I had paid a little more attention to the butterflies when I was cutting. I think having them directly centered over the button band would've been nice. Speaking of button holes - still one of my least favorite sewing things. My machine just does a horrible job of them, could be user error, and I'm always tempted to do them by hand but I chicken out. 

 I'm really pleased with myself technically speaking. I took my time with this and took extra care making sure the insides were nice and neat. I flat-felled all of the seams so I wouldn't have any loose bits. I also feel like this is one of my nicest collars - it turned out very crisp.


Every time i wear this shirt or see it peeking out from my closet it makes me smile. I love the color, it's my favorite and it matches my mint green Chucks. Pretty fun shirt overall and I know I will wear it a ton!

Thursday, November 5, 2015

A Backlog of Summer Makes


It has been far too long since I updated this space. Summer was jam packed and even though I was able to eke out a couple different pieces of clothing I just never got around to posting them. Now that it's fall and things have slowed down a tiny bit I figured I'd just do one mass post with the majority of the things I made this summer. The plan, in my head at least, is to try and get back into the routine of posting things immediately after I make them. If you follow me on instagram you've probably seen some of these - so much easier  just to post a quick snap over there.

In no particular order these are some of the things I made this summer:


 self drafted tank top with a split back made out of a scuba like material


This is the Alice Top by Tessuti Patterns and I loved it so much I made it twice (both in linen)

This top is definitely very different than something I'd normally wear. It's loose and billowy in the waist and I worry that it looks 'maternity'. On the other hand it's lightweight and breezy in the summer and is a nice mix between casual and dressy. On the black version I added piping around the armscye. I wish I had also done this at the yoke seam. I feel like there are so many variations that you can make depending on fabric choice and contrasting fabric.


This was my first time sewing a Collete Pattern. I didn't make any adjustments to the pattern; however, I wish I had used a different fabric than what I used. This was striped jersey knit which was heavier weight than a normal jersey and it made pressing hard. Also all of the fabric makes the waist droop a little bit and I really dislike how that came together there. I tried unpicking it and resewing it and I feel like it looked just as bad if not worse. The entire bodice is lined which I like because of the clean look - but it makes it heavier and warmer to wear in the summer. I honestly just wish I had saved this fabric to make a winter cardigan with instead. The first time I wore it someone came up to me and said "I love your dress," so perhaps I'm just being a bit hard on it. Sometimes you make things and hate them and this was one of them. I would probably make this again in a different fabric.


One of the first pieces of clothing I sewed used a Sewaholic Pattern and I've been hooked on Tasia's patterns ever since. I really enjoyed this pattern and how the dress came together. The fabric  is a light weight poly voile from fabric.com. I love the sweet heart neckline and the gathered ruching on the cap sleeves where they attached to the bodice. The dress has pockets and is fully lined. It's a little 'too' fancy and poofy for every day wear. I also need to work on attaching the skirt to the bodice a little straighter.


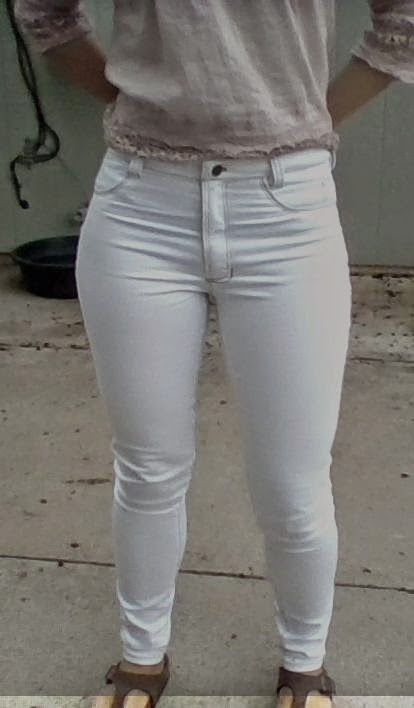
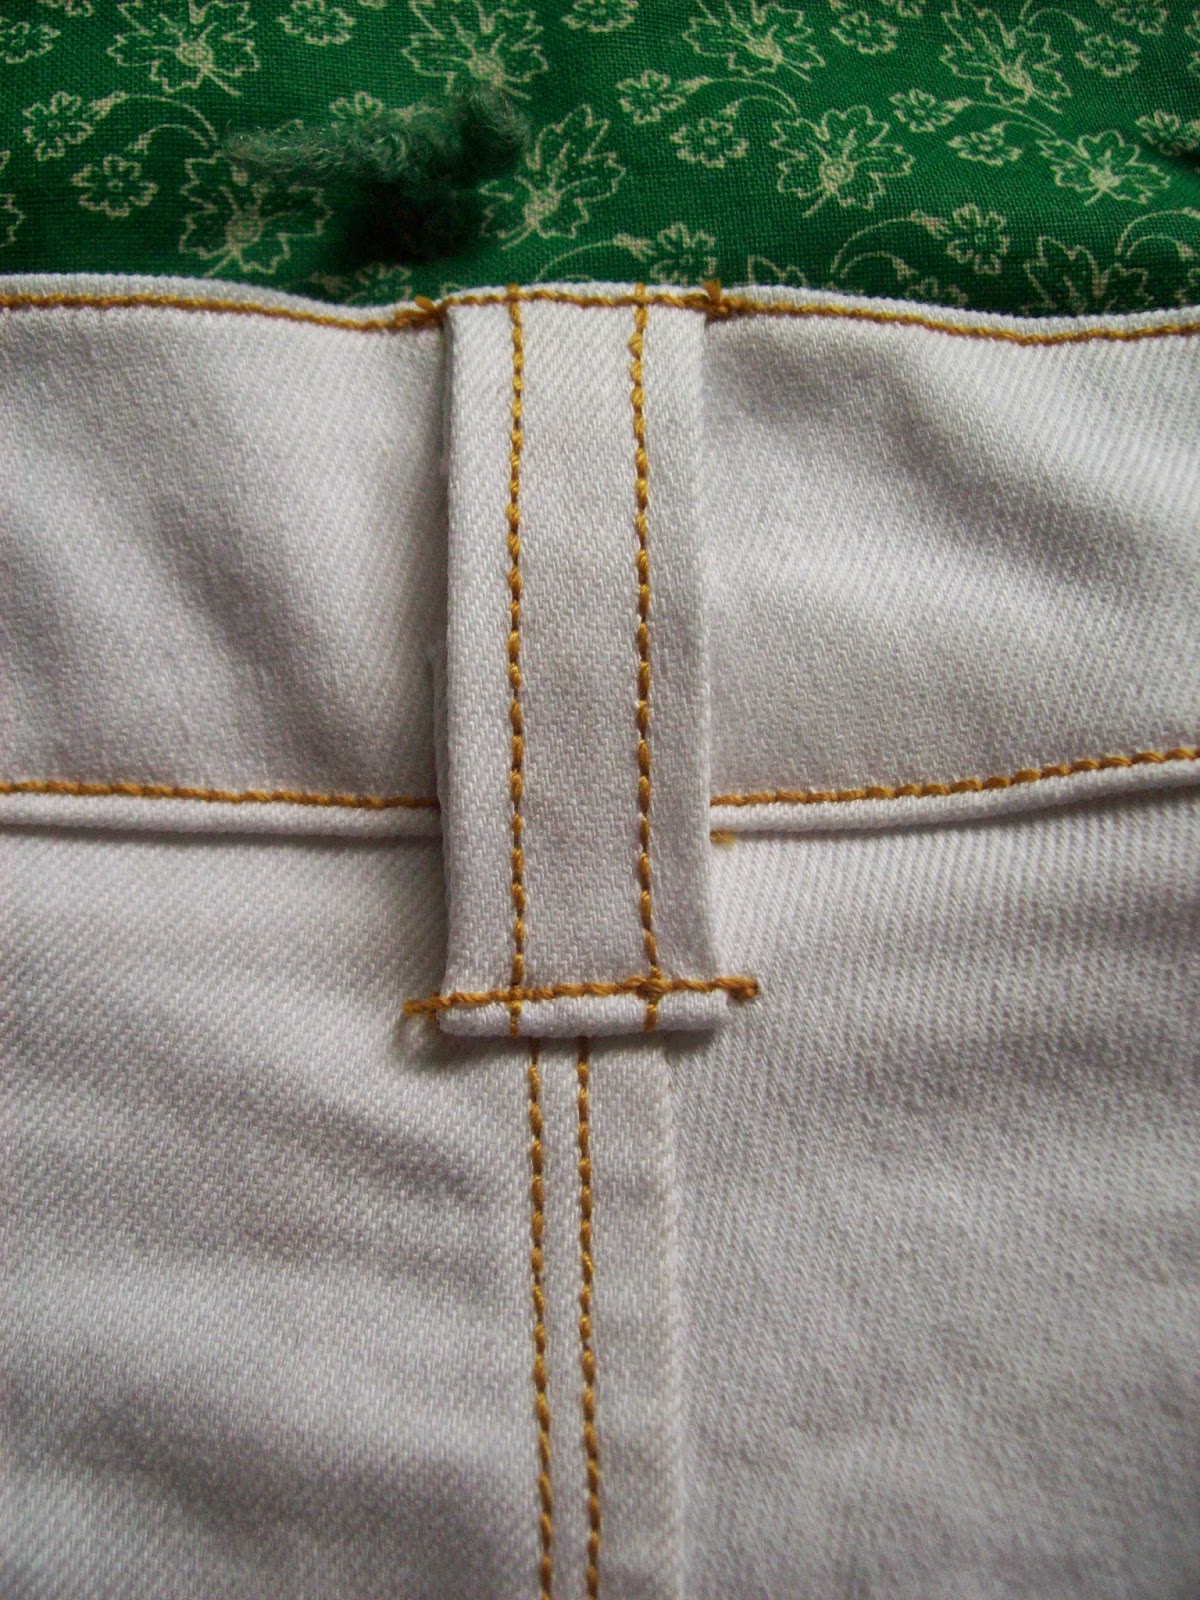
Lastly, I made another pair of ginger jeans. My initial pair was essentially a wearable muslin . There were a number of changes I wanted to make when I made them up in my cone mills denim. I wanted a true high waist style and I wanted them a little bit looser. I had a hell of a time with these. Just adding in extra height to the waist and grading to that gave me a weird boxy looking pair of pants. I unpicked some stitches and nip and tucked throughout the crotch and got a more normal looking pair of pants. Unfortunately they're a little loose and they bag out around the knees and thighs. I also probably could take the waistband in an inch due to how much it stretched out even being cut on the bias and interfaced. While they're not perfect they're definitely not horrible. In hindsight I should've taken into consideration that my denim has a lot more stretch than the white stretch twill I used for my muslin pair and could've probably just cut the original size.


That's more or less everything I made this summer. Currently I'm working on a sleeveless granville button up from sewaholic patterns. I'm also planning on making a few pairs of shorts and swimsuits for an upcoming trip to Mexico!

Monday, October 19, 2015

Burda 7057 - Dirndl Dress Costume

Fabric: Undershirt: white muslin, Bodice: Olive green twill, Apron: Keepsake Calico Quilting Cotton
Pattern: Burda young - 7057

I'm so excited about this dress. I love costume making for some reason; much more so than sewing everyday clothes. I think it's a combination of all of the components and detailing that come together making something awesome. Every year my roommates and I host a 'Haustoberfest' themed party as an anniversary to my one roommate buying the house we all live in. Jokingly I suggested that I should make a dirndl dress and then decided that I actually really wanted to. It was my first time using a Burda pattern and the instructions were definitely sparser than usual patterns I use. All in all it wasn't that challenging to put together and really no different than any other dress. I did get to practice a lot of hand sewing and some fun new techniques like pleating of the ribbon around the neckline.


I started with the dress. The bodice is fully lined in the same fabric as the exterior and there's a layer of interfacing between the lining and exterior. The skirt is unlined and the hem I catch-stitched per the instructions.

Next I made the undershirt. There were two variations, the version I made, and a version that had more ruffling around the neckline and around the sleeves. I figured since I was doing the fancier neckline trim I'd keep the undershirt simple.

After the undershirt I made the apron which was really straight forward. Last was all of the detailing. I pleated two layers of petersham ribbon into inch and a quarter segments, sewed it flat to the neckline and then sewed the ribbon together on either side causing it to form the open pleats. I have no idea if there's a name for this type of pleating.


One thing I love about costumes is the ability to customize them any way. I could have chosen so many different variations of fabric and ribbon. All in all it turned out great and I'm really pleased with the construction of it overall. Technically I think this is one of the best things I've ever made. Good thing Halloween's right around the corner - I have my costume already made!

Tuesday, June 2, 2015

Pendleton Wool Tote Bag


Fabric: Pendleton Wool & Scissor print cotton - Fancy Tiger Crafts (I can't find the name/line of the
             lining fabric on their website)
 Notions: Fancy Tiger Crafts Leather Bag Handles + Closure Kit (26")

This past weekend I went down to the Fancy Tiger Crafts shop to take their Pendleton Wool Tote Class which they offer now and again. Not to boost my own ego but I definitely could have skipped the class; however, it was a joy to browse all of their fabric and nicknacks they have in the shop. It was gorgeous in there. The machines they had available for us to work on were really nice as well. They definitely weren't anything too fancy, I was working on a beginner Janome, but they were so much quieter than my Singer.


All Pendleton fabric is double sided and I used the side that was more white - the other side has a lot more blue. I debated for awhile between a plain lining or something patterned and ended up deciding on this scissor print. I liked the yellow color because of how it matched with the bag and I knew the scissor print would make me smile when I looked inside. I have two pockets in there made out of the lining fabric. I went with two instead of three because I wanted to be able to fit my phone, wallet, and keys inside easily.


I think my favorite bit of the bag is the leather handle/closure. I feel like it really pulls the whole thing together and makes it look like a store bought bag even though it is one of a kind! In other news I have a fabric for a pair of jeans cut out and a half finished dress on my sewing table. I've been so busy lately and I keep finding other projects to work on. Grrrr - but this is what I love about summer!

Tuesday, May 12, 2015

Harper Blouse

Pattern: Harper Blouse - Spit Up & Stilletos
Fabric: Something polyester from Colorado Fabrics - I honestly have no idea what this fabric is made up of, it's pretty drapey & shifty though

I made my first 'summery' top or blouse as I like to think of it this past weekend and I really like how it turned out. I picked up this fabric last fall when I was at Colorado Fabrics down in Denver and I had been contemplating making a dress, maxi skirt, or top. I'm usually not one for busy fabrics but to me this felt summery and fun while still being work appropriate. It is sheer and you'll have to excuse my bra peeping out in the pictures above. I wore this outfit to work yesterday, with a shirt underneath, but didn't have time to photograph it so I threw it on this morning, with no shirt underneath, in order to take some quick pictures. 


The pattern was really straight forward and easy to follow. I french-seamed my seams so that I wouldn't have any exposed insides. I really like the neckline as well - would you call it a V-neck? It's not as deep as a traditional v-neck. I made my own bias tape out of the fabric and used it to finish the arms and make the waist-belt. I think using contrasting bias binding for the belt and armholes would be fun to try on a solid version of this.


As far as changes go I think I would make it a 1/4" wider on the back piece in the shoulder area and 1'4" wider right at the bust. There's no obvious stretching or pulling lines it just felt a little tight to me. Because this was such a simple top I can see myself making a ton more in other fun fabrics. I'm pretty sure I'm going to wear this a ton this summer. It also looks nice worn with a cardigan - so office appropriate in the summer time when the air conditioning is blasting. I think it would be easy to extend the hem and turn this into a fairly simple dress as well.


Sunday, May 3, 2015

'Wearable Muslin' White Denim Ginger Jeans

Pattern: Ginger Jeans - Closet Case Files
Fabric: White Stretch Denim - JoAnn's

It's still quite unbelievable to me that I'm sitting here in my first pair of jeans ever - the jeans that I'm probably going to wear everyday this week if I'm being honest. Oh man, making these was equal parts great and awful. So many things went wrong most likely because I was distracted by whatever Netflix show I was watching. That's the point of making a muslin right? To figure it all out before you make the real thing. Luckily these turned out wearable but just barely. The nice thing is that I did feel like i learned a lot and I know now what fitting changes I will make for next time. And there will be a next time because I have 6 yards of raw denim waiting on my shelf to be cut into - wahoo!

Connie is thinking 'Why are you taking so many pictures of your butt?'
Also can you see the dirt on my seat from riding my bike seat earlier? This is why I can't have nice things

I knew I wanted to make a muslin of these because I've never made jeans before and I was worried about all kinds of fitting issues. I decided to make view B first which is the high waisted skinny leg variation. Before sewing I basted all of the pieces together and everything seemed to fit just fine. What I completely ignored at the time was that the waistband was falling about 2 inches below my belly button. On the instructions there's a little notation that says that view B is supposed to fall right above the belly button. When I cut out my pieces I based them off of the finished measurements listed. I cut a 12 throughout the legs and hips but graded to an 8 up to the waist and I cut an 8 in the pockets as well. Big mistake number 1. This would've been fine if the rise of the jeans actually ended above my belly button where I fit into the size 8 measurements, but because these fit lower on me where they ended was about a size 10 measurement. So when I tried them on after sewing them pretty much together minus the buttonhole they were way too tight around my waist. The pockets were also to small and were gaping and bulging. Disaster.


 Luckily due to the 5/8" seam allowance I was able to unpick them at the sides and ease out the seam to a 1/4". I had enough leftover fabric to recut the waistband and all was good and well... until I pulled the slider off the zipper and then almost cried when i couldn't get it back on. I was ready to give up (I was not taking apart the fly front and resewing it with a new zipper) when I managed to get it back on. Crisis averted and all was well...except for the pockets which were still gaping because they were too small. So I decided to just sew them shut along the topstitching and voila! No more gaping - alas no more front pockets. Who uses front pockets anyways? The fix for next time is to lengthen the wait rise of the pants at the lengthen/shorten marking probably by an inch or two. I think I'll still cut a size 12 through the legs, grade up to a 10 through the hips & start of the torso and end at an 8 around my belly button. I think I'll err on the side of caution and cut the pockets at a size 10 next time just to avoid gaping issues.


The topstitching was actually really fun even though I need to work on going slowly and staying even a bit more. My basic Singer machine handled it like a pro and only needed some coaxing over the thicker fabric areas.


These took me about two and a half weeks to finish mainly because I only had time to sew in fits and spurts. I'm pretty sure they'll take less on this second pair. I'm going to take a break and sew something else in the meantime but then I'll be back with my second pair. I have some otter wax I've been holding onto that I think I'm going to use to make a waxed pair! Let me know what you guys think in the comments below.