photo HomeHeaderPages_zps121b83d7.jpg  photo AboutHeaderPages_zps6faf416f.jpg  photo ContactHeaderPages_zps0989aee4.jpg

Monday, December 8, 2014

Rochester,NY - Flower City Inspired White Russian Sweatshirt

Fabric: White Waffle Knit Fleece - Colorado Fabrics
Pattern: White Russian - Capital Chic Patterns

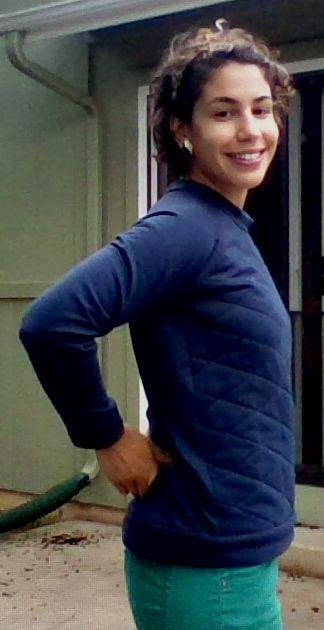
After I made my first quilted white russian sweatshirt I knew I'd be making another before long. I picked up this fabric from Colorado Fabrics when I went down to Denver around September. It's hard to see in the pictures but the right side of the fabric actually is textured with a waffle pattern while the inside/wrong side is some of the softest fleece I've ever felt. The material has a bit of stretch to it and it's kind of spongy. I know that's a weird description but really there's no other way to describe it. When you pinch it between your fingers it almost feels like a foam mattress pad. The inspiration for this sweatshirt comes from Rochester, NY where I lived for a year a couple years back. Rochester was originally referred to as the 'flour city' due to producing a ton of flour, but as farming practices changed and the city did as well the nickname got changed to 'flower city'.

The city of Rochester logo                                                                                  My applique
 
Since the fabric I was using was already textured I decided to do some applique instead of quilting on this version. Out of a black knit fabric I cut out 5 pieces that I traced from the city of Rochester logo. I then pinned them on the center of my fabric and started to sew them on. I quickly realized that picking knit fabric to applique probably wasn't the smartest idea because it immediately started to stretch out of proportion. I ended up handing basting the pieces down, but they still ended up shifting a bit. After applying the applique the rest of the sweatshirt was a breeze to sew.


I figured I'd probably wear this sweatshirt to go snowboarding in a lot because the fabric was so cozy. With that in mind I chose to lengthen the pattern by 4 inches at the hem and grade out from the waist to the hem an inch on each side. I wanted a looser fit because I like to layer clothes when I go snowboarding and I didn't want to feel too bulky.

An action shot of me on the slopes at Keystone


I've already worn this twice to go snowboarding in and I love the feel and the length of it. I prefer to wear longer styled things so that when I fall (which happens a lot) less snow gets in my pants! I finished this and a couple projects ages ago, but never got around to blogging them. For me, if I don't take pictures and post something within a week of finishing I find that I'm less inclined to post it. Usually I've already started on a new project and am just so focused on that I forget about what I've made. With that said I'm trying to catch up on sharing the recent items I've made and the new stuff I'm working on: lots of Christmas sewing!

Thursday, October 23, 2014

Kelly Skirt


Pattern: Kelly Skirt - Megan Nielsen
Fabric:  Plaiditudes Collection - Brush Cotton Herringbone Brown & Black - JoAnn Fabrics (they no longer have this color)

I'd been wanting to make more skirts and dresses that had a 'fall/winter' feel to them so when I saw this heavier herringbone fabric I knew that it was destined to be a skirt. This was a fairly straightforward sew, and one of my favorite parts is that it has lined pockets! I'm not sure why it is but I love dresses and skirts that have pockets on them. In addition to the pockets the skirt buttons up the front and has pleats in both the front and the back. In hindsight I wish I had chosen lighter buttons for the center front so that they'd stand out a bit more. My buttonhole foot was working this time and so getting those button holes done was a breeze.

I was having a horrible time with lighting when I tried to take these pictures so they look a little washed out

I lined the pockets with this malachite cotton silk I had leftover from this tote bag project. Unfortunately I only had a few scraps left otherwise I think I would've lined the entire skirt. The pattern doesn't call for a lining, or include a pattern for one; however, you'd just need a rectangle, but having one would make it a little heavier for colder days. I ended up hemming it about 4 inches more than the pattern called for. I don't think I'd hem it that short again, probably just 2 inches next time, but the original hemline wasn't flattering as it was hitting mid knee. I thought about unpicking the hem and making it a little longer since I realized it  looked pretty short once I put it on, but then I decided I'd most likely be wearing this with tights or leggings this winter and decided to leave it. Interestingly it is finger length (did you guys have that rule in school about shorts/skirts/dresses needing to be finger length too?) but the bell shape because of the pleats makes it look shorter than it really is.


I'm not sure how big of a fan I am of the pleats on the back, from the side at least I feel like it adds to my back side but not in the most pleasant way. I interfaced the waistband and next time would also interface the center front placket in order to avoid stretching with the buttonholes. The only problem I had was that my waistband ended up really tight, so much that it was gaping and I had to sew a snap closure underneath the top button. I'm pretty sure I cut my pattern pieces out correctly, however when you sew on the waistband you leave some overhang that gets trimmed off when you turn the pieces right side out. I think next time I'd leave the overhang and sacrifice the look of everything being lined up down the center. I'm okay with the waistband buttons being a little off center from the center placket. Especially if it means I can eat, move comfortably, or breath when wearing the skirt. I made another version of this for my roommate out of some scrap fabric she had and hers fits perfectly. I'll have to take some pictures of it because it's very different than my version: side zipper, faux button placket, scalloped hem, faux pockets! As always, thanks for reading.

Monday, October 13, 2014

Scoop Neck High Back Long Sleeve Golden Nettie Bodysuit


Fabric: Mustard Yellow Solid Cotton Spandex Knit Fabric - Girl Charlee

If you're thinking another Nettie Bodysuit? The answer is an unapologetic yes! I'm loving this pattern for fall, mainly because wearing super stretchy knit fabric is really comfortable, but also because of how warm and cozy these bodysuits are. When the pattern came out earlier in the summer the thought of wearing a skin tight bodysuit in the hot sun wasn't really appealing to me. Now that the weather has cooled down though these things are great! This was a super quick sew considering that this was my second time working with the pattern, I'd previously made a three quarter length sleeve, high neck, low back version. It took about 3 hours from cutting the fabric to finish, enough time to finish House of Cards and start watching Bates Motel - which has a nice eerie feel to it, perfect for October.


This fabric had a lot of stretch to it similar to the fabric I used for my last Nettie. I wanted to avoid wrinkles around the midsection due to the fabric being too loose so I sewed an 8 through the bust, graded down to a 6 in the waist, and then went out to a 12 through the hips. There are no wrinkles this time and it doesn't feel too tight. I think I could get away with a 10 in the hips. The 12 fits nicely over my bottom, but it's not necessarily snug which isn't an issue just something I might tweak in the future. 


Last time I also had some problems with stretching under the armscye, but the high back seems to have rectified that and I didn't need to make any adjustments throughout the shoulder. Overall I really like the way the scoop neck fits and I like that it's not too low. I had considered getting some other fabric or stretch lace to make a contrasting binding around the neckline, but decided to just go the straightforward route this time. I have a fancy schmancy Nettie dress planned that I think I'm going to incorporate lace into.


Can we talk about how fun this skirt is by the way? Have a great week you guys!

Monday, October 6, 2014

Nettie Bodysuit Skirt Hack

Connie is definitely trying to eat my brand new skirt. BAD GOAT

Pattern: Nettie Bodysuit/Dress that I hacked into this skirt - Closet Case Files
Fabric: Eclectic Voyager Fabric - JoAnn Fabrics 

I had picked up about 2 yards of this fabric earlier this summer to make a dress with, but when my mom was in town I ended up making her a dress instead. I thought I'd have enough fabric left over to still make myself a dress but I didn't use my fabric wisely and instead only had enough to make a skirt.

My mom modeling her dress!


I started looking for knit skirt patterns and was considering purchasing the Mabel skirt by Colette Patterns but I held off. Later that same day I happened to be tracing new pieces for an upcoming Nettie Bodysuit and I realized that the dress variation bottom would probably be easily transformed into a skirt, the only piece I'd need to draft would be a waistband. So using the dress bottom and front pieces I started at a size 8 and graded up to a 12 about 4 inches down, to accommodate my derriere, and then went down to a 10. After sewing the two side seams together, which only took about 10 minutes, I cut a 2 inch wide piece two inches shorter than measurement of my waist skirt opening. I pressed it in half but only sewed one half (right sides together) to the raw edge of the waistband opening. This way when I folded it up and over I was able to slip stitch my loose edge of my waistband piece to the inside of the skirt and hide the stitching from attaching the waistband. I forgot to include seam allowances when cutting my waistband piece so instead of an inch waistband, it's about a quarter inch instead, but that's okay!


It was cold the morning I was taking these pictures so I threw a sweater on top of the Nettie bodysuit I'm wearing with the skirt. Even though I'm not a big pattern wearer I can see this skirt being a fun way to break up some of the 'dullness' that goes along with winter. Plus it looks great with a sweater thrown over or a shirt tucked in. The best part about pairing it with my bodysuit is that there was no bulk around the mid-section. The best part about knit skirts however, is how nice they look but how comfy they are, win win!

Monday, September 29, 2014

Scraptember Inspired Polly Tank Top

Yes that's a goat, her name's Connie. Also it's weird to see myself in the exact same pose with the exact same facial expression
Pattern: Polly Tank Top - By Hand London
Fabric: Scrap fabric leftover from a kimono I made and a disaster shirt I took apart

I had a little modeling session this morning, it was more that I couldn't figure out what I wanted to wear this shirt with. As you can see on the left I started a little more casually, but then I decided I didn't really want to wear that to work so I changed and then decided to take a few more pictures. Connie, one of our backyard goats, decided to help me model. I think she thought I was hiding food. After I made my first Polly, I knew I wanted to make another one and this is sort of what I was envisioning. Last week Morgan from Crab & Bee posted this gorgeous triangulated scrap dress she had made in honor of Scraptember, and it was my inspiration for this top.


I used leftover scraps from a Renfrew top I had made last year back when I really didn't know what I was doing (I still don't know what I'm doing half of the time, I'm just a little better nowadays) and made a knit pattern out of a chiffon like fabric, and from the kimono I made earlier this spring (both links are listed up top!). It was kind of fun trying to get the pieces I needed out of the fabric I had on hand. You can't see it in the picture above but the cream fabric that's supposed to be cut in one piece had to be cut in two because of the shape so it's seamed together up the center. I had to also sew the back in two pieces down the center for the same reason. That's sort of where the fun ended for me, I realized while I was making this that I don't really have a lot of practice sewing silky, shifty, easy fraying fabrics. I kind of hate them, a lot. They're a pain in the ass to cut out, there's no ease, and just super fiddly all around. Most sewers seem to be afraid of sewing with knits, but the majority of the things I've made since I started this blog have been with knit fabrics and so I feel confident making those. I know the only way to become more comfortable is to continue to sew with these types of fabric just like I did when I was starting with knits. Still, yuck. All in all it came out okay. One of the shoulder straps is more narrow, and the hem was originally uneven but I fixed that up easily enough.

Surprise! Completely different fabric in the back

Speaking of the hem, I don't think I will sew it the same way the next time I make another of these tops. The instructions have you sew a line of stitching at 5/8ths of an inch, then press it up, and then fold it again. It was hard for me to hem such a big rounded hem. I think I will sew a line of stitching at 5/8ths of inch, press up and trim the excess to about 1/8th of an inch and then use my rolled hem foot to sew a tiny hem. Because this fabric frays intensely I finished all of my seams using french seams. I sewed and 8 up top, graded down to a 6 through the waist, and back out to an 8 in the hips. Last time I had noted a little bit of a swayback issue, but this fabric has a lot more drape and I don't have that issue with this top. Can you guys believe it's already going to be October???

Monday, September 22, 2014

Navy Blue Quilted White Russian Sweatshirt

Fabric: Indigo Blue Cotton Jersey Sweatshirt Fleece Knit Fabric - Girl Charlee
Pattern: White Russian - Capital Chic Patterns  

So now that I'm very into sewing up my fall wardrobe, it's back to being 80 this week, and while I'm loving the warmer weather it's so frustrating to not be able to wear any of my recent makes. I whipped this sweatshirt up this weekend and am now wanting to wear it everyday, it's truly such a ready to wear item, I can't even take it. Usually I try to avoid cutting out my fabric and sewing on the same day to not get into an angry impatient sewing mood. But there were only 4 main pieces not counting hem, collar, and neck band and it looked like a pretty straightforward pattern. Since I've been more focused on 'quality makes' this has been one of the quickest things I've sewn up. I cut the fabric out in the morning and quilted the front section, took a coffee break (shameless plug: did you guys notice my new social media icons on the right sidebar?) , and then got back to it and was done in about two hours. Such a nice easy sew it was honestly very satisfying. 


Ok, let's talk about my favorite part: the quilting! The pattern called for pre-quilted sweatshirt fabric if you could find it or you could quilt your own. They didn't have any pre-quilted fabric on the Girl Charlee site when I was shopping around and I figured it'd be more fun to quilt a custom design anyways. I decided to just stick to a basic diamond pattern, but i feel like it lives up to the namesake of the pattern company and makes it feel less "sweatshirty" and more chic. To get the thickness needed for the quilting to show up I used cotton batting that I had picked up at JoAnn's and layed out my design with chalk. I cut two front pieces out so that I wouldn't have to have the batting showing on the inside. The batting and the extra layer of fabric do make it a little bulky, but there is still a lot of shape and ease. I almost feel like it looks like one of those fencer uniforms. Enguarde! A part of me almost wishes I had sewn the quilting in contrasting fabric to get more of a pop.

I feel like I look slightly like a chicken with my arm like that

I did run across a little problem when attaching the bias piece to the neck band. Even though this fabric is a knit fabric it didn't have a lot of stretch, and even with a lot of trying I couldn't get the neck band to stretch enough to not have wrinkles around the neck seam. I didn't really want to cut out a new piece, so I added a pleat to the top back  (which is what you can kind of see in the above right picture) and then re-sewed down the neck binding and it fit perfectly. Next time if my fabric doesn't have stretch I'll remember to cut that piece a little bit bigger, interestingly I didn't have a problem with my bottom hem or cuff pieces. There weren't any instructions included for how to finish the seams. I ended up doing my usual zig-zag stitch followed by some grading down to reduce bulk, but I'm sure most people with sergers just finish them that way. 

I already have two more variations of this in mind which I will hopefully get to share with you all soon. What do you think, are you a fan of the fancy sweatshirt?

Monday, September 15, 2014

High Neck Low Back Nettie

I'd never thought I'd say this, but I'm the proud owner of a bodysuit!!!
Fabric: Hunter Green Solid Cotton Spandex Knit - Girl Charlee 
Pattern: Nettie Dress & Bodysuit - Closet Case Files

Life is funny sometimes. You get older, things change, people change, and sometimes at the age of 26 you find yourself wearing an adult sized onesie. It's like being a baby all over again except this time you remember it, not mention much more fashionable! Which is why we're calling it a bodysuit. That makes me think of something sleek, high fashion, and a little femme fatale. The designer of this bodysuit is none other than Heather Lou from Closet Case Files. Heather is the brainchild behind the Bombshell Swimsuit which I made previously this summer. Heather's also really nice and professional. I know this firsthand because I emailed her with some issues I was having and she got back to me ASAP, was helpful, and didn't make me feel like an amateur for having problems. It's scary when you first enter the sewing world and you see people pumping out amazing pieces of clothing with awesome technique. When you get treated like an equal it makes asking questions and chiming in a lot easier.


When this pattern was first released I actually wasn't that interested. But then I thought about things I complain about in my everyday wardrobe: bulky tucked in shirts and weird waist bulge when wearing a shirt tucked into a skirt. The Nettie really fixes all of those things because of how it's constructed and the body conforming nature of a stretchy knit fabric, not to mention the pattern includes variations on front and back neckline and arm lengths making it pretty versatile. If bodysuits still aren't your thing there's a variation for a dress included. This was my first time buying fabric from Girl Charlee and the only thing I didn't like was that you can only buy fabric in whole yards. I ended up getting 2 yards of this even though I only needed about 1 and a quarter, but that's okay because I had a gift card from my sister (thanks, Renee!).

Coco is side eyeing the crap out of my modeling skills

I chose to make the high neck and low back variation with 3/4 length sleeves because I have zero pieces of clothing like that in my closet currently. Overall this is super easy to make and the only time intensive part was sewing in the shelf bra and bra cups in order to have support and go sans bra due to the low back. When I was trying this on before sewing it all together I realized that for some reason the shoulder/armpit seam in the back was falling in front of my natural shoulder/armpit and causing there to be an excess of fabric underneath the armpit area. When I would put my arms down this extra fabric would get stretched to the back and pull around the front creating a bunch of armpit stretch ripples which you can see a little bit in the top picture. This is when I emailed Heather and asked her for tips/suggestions/and my ideas of what was happening. She gave me great advice and I ended up cutting the back piece armscye lower and re-cutting the sleeves to fit. It helped a little bit, but if you went up and looked in that top picture you can still see some stretching and ripples. I think this is mainly due to the low back cut, the breadth of my upper back, and the stretchy quality of the fabric. This fabric had over a 50% stretch and I think if it was a little less stretchy it might not have pulled as much, and the bodysuit would have fit more snug overall. I have plans to make a scoop neck, high back variation so I'm interested to see if that fits better or if these are adjustments I just need to make when working with this pattern. I sewed a size 8 through the bust and the waist and graded up to a 12 through the hips. I think next time, especially when working with fabric that has so much ease I'll grade down to a 6 in the waist because it was a little loose and I was getting some wrinkles when moving around. I like how this turned out and it feels really comfortable. I can see myself wearing this a ton this fall, especially layered with cardigans! I wore it to a bbq this weekend and got a bunch of compliments on the low back, and then a bunch more praise when I said that I made it. Always the best feeling.

Monday, September 8, 2014

Flannel Plaid Grainline Archer

Horrible pictures, I'm trying to get more natural lighting...apparently first thing in the morning is too much lighting

Pattern: Archer Button Up Shirt - Grainline Studios
Another Archer? Quite simply, yes. After making my sleeveless version I knew I wanted to make only about a million more. Not only is it a comfortable well constructed shirt but it's a piece I'll really will wear on a regular basis - cake and not icing as many other sewing bloggers have started to say. I think people love Jen's patterns a lot because they're ready to wear (RTW) basics.

Much better pictures! 

I sewed up a size 4 just like last time; however, I didn't lengthen it by an inch like I did with my sleeveless version. I realized I didn't really need that length, and the extra length was causing the back to be boxy. Surprisingly for this being my second time sewing this shirt I had a number of issues. I had a hard time with all of the pieces cut on the bias. This fabric had a surprising ability to stretch out a bit (you can kind of see how the front placket with the buttons looks a little warped in some spots in the picture on the left) and all of my bias pieces were extremely temperamental. I ended up sewing the pockets on, taking out stitches, repositioning, and resewing a couple times on each side. Then when I was sewing the collar on I realized that my collar was looking very short...turns out I had cut out the wrong size and luckily I had enough fabric to re-cut a new piece. I had already sewed the whole collar on at that point though so I had to unpick it all, and then resew it all together. That took about two episodes of House of Cards. My roommate came to check on me after she woke up from a nap and found me sitting in the exact same position I had been two hours prior and she was able to coax me away from the sewing machine.


Best plaid matching ever! Even the sleeves line up!
I followed Lladybird's tutorial on plaid matching, which made the whole process very simply. The key is to be very careful when cutting out your fabric. After that you really don't have to think about it at all. One thing I want to work on is getting better at sewing buttonholes. My one step buttonhole foot wasn't working, user error may have played a part in why it was working....alas, I had to zigzag each side of the button hole individually and let's just say it's a good thing the button hides most of the hole when the shirt is buttoned. Like all of the skills I've learned this far in life and sewing: practice makes perfect! I'm already envisioning another Archer, this time the alternate version with the back ruffle, in a flowy cream chiffon. What type of Archer would you make?


Friday, September 5, 2014

Fall and Winter Sewing Plans

What's better than new fabric???
It certainly seems like Fall is here in CO. Today was grey and rainy and only in the upper 60s and that is what the forecast is looking like for the next week or so. It might end up warming back up, and even on the colder days here when the sun comes out it can feel hot out of nowhere. All this cooler weather has me thinking of fall and with that all of my fall sewing plans. Similar to my spring & summer wardrobe post I've decided to put together a list of patterns/silhouette's I'd like to sew this fall and winter season.

1 , 2 , 3 , 4 , 5 , 6 , 7 , 8 , 9 , 10
 The pictures above (which are linked to their respective patterns according to the numbers in the corner) are all patterns I want to make this season. I have three different button ups mainly because their styles are so different but button up shirts can easily go from casual to dressy depending on the type of fabric you make them up in. I'm also really feeling like wearing a lot of raglan sweatshirts/sweaters that are normal sized and oversized. I personally can't wait to make #10 which is the White Russian sweatshirt by Capital Chic patterns. I also know Jen from Grainline Studios has been hinting at a new pattern she's hopefully getting ready to release any day which looks to be a raglan sleeve sweater/jumper/sweatshirt top. Some nice longer sleeved tops will be a great addition to my collection of shirts seeing as how I mainly have a lot of t-shirts and tank tops and usually have to layer on cardigans in order to stay warm. Besides that I'm not going to let a little cold weather deter me from wearing skirts and dresses. That's what tights and leggings are for! Plus I have no 'winter' dresses or skirts in my wardrobe really. Every dress or skirt I own is pretty lightweight so it'll be nice to add some heavier ones to the mix. All in all I'm pretty excited, I have a bunch of fabric to work through and already ordered patterns just waiting to be printed off! Now I just need more time in the day to work on everything.

I don't know if anyone noticed but I added some features to the blog the other day. On the right hand panel there's now a link to follow me on Pinterest. I've created a Pinterest account specifically for this blog and I have boards dedicated to patterns, sewing tips, and style inspiration to name a few. I've been pinning away on my fall/winter style inspiration board so make sure to check that out (you'll notice I wasn't joking around about the oversized sweater love). Additionally, you should be able to now pin images directly from my pages by simply hovering over any image on the blog! Hopefully this stuff makes it easier for you guys to save your favorite things and keep up to date on all that's going on over here. As always thanks for reading.

Monday, August 25, 2014

Chambray and Batik Polly Tank Top

Fabric: Chambray Quilting Cotton - JoAnn Fabrics (same fabric used in my Archer)
          Batik Quilting Cotton - JoAnn Fabrics
Pattern: Polly Tank Top - By Hand London (Free Pattern!)

Happy Monday everyone! This is also the 'first day of school' here at CSU; however, since I'm in graduate school I've been here every day this summer. Doesn't really feel that different just much more crowded. Over the weekend I sewed up this fabulous tank top, which has been on my list of things to make for a couple of weeks now. This was my first time sewing a By Hand London pattern and if this pattern is representative of their whole collection I'm a devoted shopper. The nicest part is that this is a free pattern, and not just some stick figure drawing hack of a free pattern. They treated this just like any other pattern that you'd be paying for with complete step by step instructions, pictures, and some funny quips here and there.

The fabric is much more vibrant in person

I had originally planned to put the batik fabric on the front panel and use the chambray for the top and back. After cutting out the pattern I realized I wouldn't have enough of the chambray to do that. I made the mistake of cutting out the front contrast batik piece first and I layed the pattern piece out in a weird way to fit better with the pattern on the fabric. In doing so I didn't have a piece big enough to cut out the back in one piece. Whoops, newbie mistake. I ended up cutting out the back piece in two halves and sewing them together to make one piece. At that point pattern matching was out of the question, and I was a little annoyed but because of the randomness of the pattern and all of the colors the pieces actually don't look too badly unmatched. I cut an 8/12 on top, graded down to a 6/10 in the waist, and back to an 8/12 through the hips. It fits great in the top and hips, I like the fit and length overall, but I'm wondering if I should have graded down a bit more in the waist for a more fitted look. I'm always worried that if I grade down too much it will be too tight, but I might take a risk and experiment next time.

1 point for top stitching like a pro. -1 point for not matching up my bias seam with the fabric seam

I really like how the chambray blends in nicely with the fabric. From the front this shirt seems more business casual but the back is definitely all party. I've realized that I actually like sewing on the bindings on the neckline and armholes, it's one of my favorite parts in the whole process. I think it's the attention to detail when top stitching it down, not to mention it looks so polished once that step is done. I still need to work on making sure my seams match up though, luckily this is under my armpit so no one needs to know. I have some leftover scrap fabric that I might use to whip up another one of these in the next couple of days, it was such an easy sew. I've currently been watching House of Cards and have been using sewing as an excuse to binge watch episodes. I've seen some Poly dresses around the blogosphere as well, and I can envision a bodycon black one with a lighter contrast panel. The curves of the contrast panel really accentuate your bodies natural curves which is always an added bonus. As always thanks for reading!